What Is A DNS Server And How Can You Fix Common Issues Regarding It
Do you ever wonder what works behind the scene when you use the internet to perform a search or send mail? It is a grand mechanism that works behind the scenes to give you all the information you need. A DNS server is a part of the huge system and it works between your typed URL and the network devices to make the connection possible.
Already psyched about it? Read on below as we discuss what is a DNS server and how can you fix the most common problems we often run into while using it. Also, if you get inspired by this article and want to be a part of the grand design by venturing online with your brand-new website, check out the exciting web hosting domain offers and grab discounts on your new domain & server needs.
Contents
What is a DNS server?
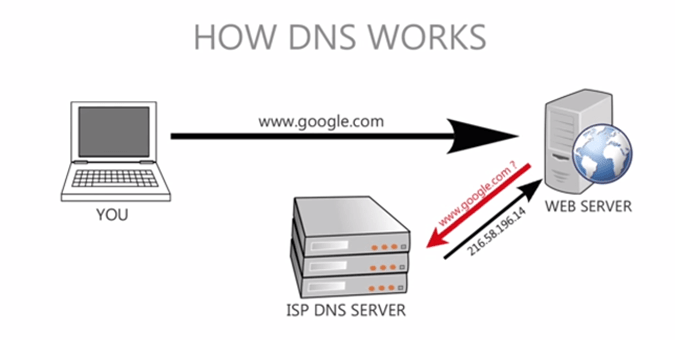
DNS is the abbreviation of the Domain Name Server. As the name suggests, the main responsibility of a DNS server is to transform the name of the URL you type in your computer to something that a web server understands. You must be wondering what is the need for such transformation. Well, we can surely understand written words and what they mean but a web server does not. So, the DNS server converts the URL requested by you into a bunch of numbers ( defined as IP ) which the network systems understand and lets you connect to your requested website. This is certainly not the most convincing system out there but it is the only system available for us to make a connection to the particular web servers we want to connect to.

Change DNS settings in Windows 10
You can change or update DNS settings on Windows 10, 8.1 and 7
Press Windows + R, type ncpa.cpl, and click ok,
This will open network connections window,
Right-click on the active network adapter and select Properties.
Find Internet Protocol Version 4 (TCP/IPv4), click on it to highlight it, then click on the Properties button below it.
The window that pops us is where you’ll be able to change your DNS server.
By default, Obtain DNS server automatically will be the selected option.
Change this to Use the following DNS server addresses by clicking on the radio button beside it.
Then set Google Public DNS IPv4 addresses:
8.8.8.8 8.8.4.4
Or OpenDNS IPv4 addresses:
208.67.222.222 208.67.220.220

Fix DNS server issues on Windows 10
Due to the complexity of the DNS server systems and the vastness of today’s internet, we often run into several problems with the DNS server and I bet you’ve also faced many of them. Thankfully there are several easy walkarounds available to solve these issues. So, if you’re getting an error message saying “DNS server is not responding” or “Your computer appears correctly configured, but the device detected or resource (DNS server) is not responding” then follow the steps mentioned below to get rid of this annoying issue.
Checking your network connection
People often get DNS errors when their internet connection is not set up properly. Be sure to check each and every router, modem, or wire you are using and make sure that they are in working condition and are properly connected to their respective ports.
If everything looks fine, go ahead and open the control panel. Once there, select ‘Network and Internet’ and on the next screen select ‘Network and Sharing Center. In the network and sharing center, you should be able to see details about your internet connection. Make sure to check if the access type says “Internet” or “Local and Internet”. If everything is okay, move on to the next step and if you find anything different than what we’ve mentioned, contact your internet service provider ( ISP ).
Running Windows Network Diagnostics
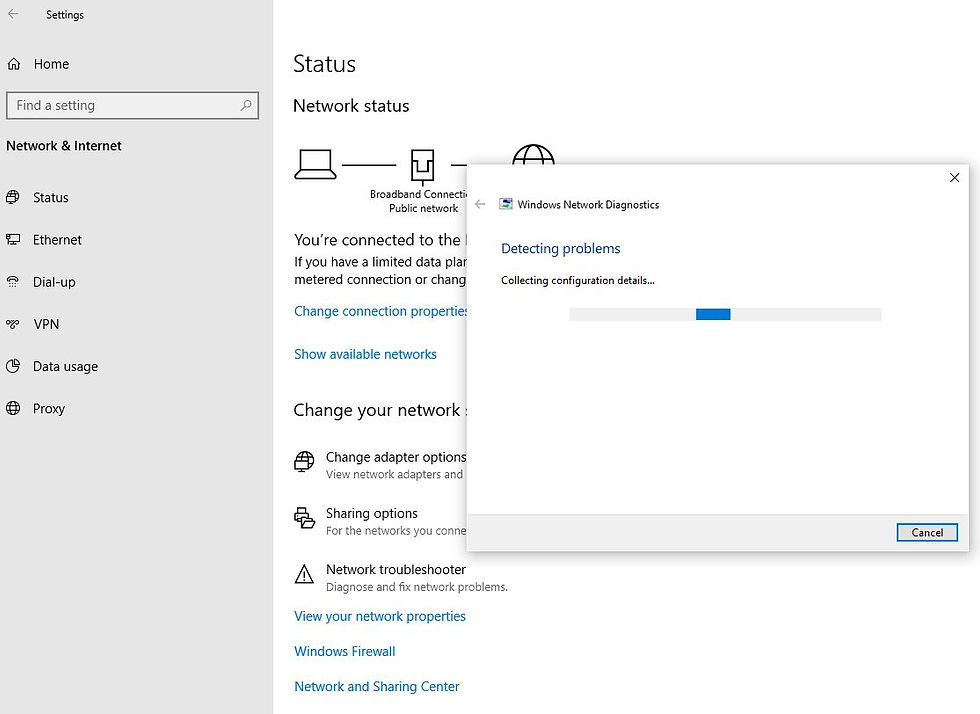
Starting from the network and diagnostics center, select ‘Troubleshoot problems’. For older versions of Windows, this should open a troubleshooting page and will give you a choice to choose what kind of issues you are facing. Run the troubleshooter and do not hesitate to perform recommended actions and fixes. If everything goes well, this will solve this problem for most of the users.
Right-click on windows 10 start menu select settings,
Next click on Network & Internet,
Scroll down and locate network troubleshooter click on it,
Follow on-screen instructions to start the diagnose process.

Updating the network adapter drivers
If the above solutions did not work for you then it is likely that you are facing a slightly complex issue.
We’ll be starting to address this issue by updating the network adapter drivers. For a large number of users, this issue disappeared as soon as they updated their drivers, and the process to do so is pretty simple. Follow the instructions below step by step to reinstall your network drivers.
Press Windows key + X Select device manager.
Look for network adapters in the long list provided by the device manager.
Right-click on the network adapter and select ‘Uninstall’. This will uninstall the current network adapter driver.
On the top of the screen in the device manager, click on Action and click on scan for hardware change. Click it.
Now again find the network adapter and right-click it.
Select ‘Update Driver Software.
Once prompted, select ‘Search automatically for updated driver software.
Now Windows will install the appropriate and updated drivers for your device.
Once the installation is complete, restart your device.
Checking for malware and overactive antiviruses
In some rare cases, DNS issues can be caused by malware that can enter your system via the internet or through a corrupted file you manually ran in your system. Though the possibilities are very low, still be sure to check the device using a powerful antivirus especially if you are running older versions of Windows or if you don’t have an antivirus program installed.
Nowadays antiviruses not only defend us from viruses within our system but also protects us from malicious websites. Now the latter can be an issue sometimes as the antiviruses tend to block internet connections as soon as they detect something fishy. Often some app updates going on in the background of your device can trigger a false alarm for the antivirus and it may forcefully disable all internet connections. Be sure to check the device with the antivirus program turned off and if this solves your issue, immediately contact the antivirus vendor for more details on how can you avoid such issues in the future while keeping the antivirus on.
Performing a clean boot
This problem can also be caused by third-party software which is malfunctioning. Perform a clean boot is very helpful to find out and diagnose the issue. To check that follow these simple steps.
Press Windows key + R.
Write ‘msconfig’ and hit enter.
A new window titled ‘System Configuration will open.
Check ‘Hide all Microsoft services at the bottom and click disable all.
Click Apply to save these choices and hit OK to close the window.
Restart your PC.
If you don’t face the problem after the restart then you can be certain that this is caused by a third-party application.
Repeat the procedure and allow only 1 third-party app at a time to identify the culprit.
If you manage to identify the application, promptly uninstall it.
Conclusion
DNS servers are an integral part of modern network systems and their complexity is the cause of frequent errors. But it is certain that most of the common issues can be dealt with using the steps mentioned above. If you’re still facing the same problem after trying all these solutions, don’t hesitate to reach out to your PC manufacturer for help and servicing. You can also reach out to Microsoft by following this link and get your issue resolved.
Also read:
How to Configure and Setup FTP server in Windows 10, 8.1 and 7
Fix unidentified network no internet access windows 10, 8.1 and 7
Solved: Proxy server is not responding in windows 10, 8.1 and 7
Solved: This device cannot start (code 10) Error network adapter
Download Chromium-based Microsoft Edge on Windows 10, 8.1 and 7


Comments